
How (and why) to Create and Install a Facebook Pixel on Your Website
If you’re using Facebook ads to promote your business, there is one essential tool you should consider: The Facebook Pixel. It gives you the ability to maximize the efficiency of your promotions, target highly specific audiences, and get the most out of your ad budget.
Let’s take a look at how it works!
- What is a Facebook Pixel?
- What Does a Pixel Track?
- How to Create a Facebook Pixel
- How does Facebook Pixel Add Value to my Campaigns?
- Are You Ready to Convert More Customers?
What is a Facebook Pixel?
The Facebook Pixel is a piece of code that you place on your website. It collects data that allows you to monitor conversions from Facebook ads, track the effectiveness of your ads, build targeted audiences for future ads, and even target people who have previously interacted with your website.
It works by installing a tracking cookie that collects data about your website visitors so you can reach out to them later via retargeting. Additionally, you can track their behavior when they return to your site, which helps you to determine which ads are the most effective. It also allows you to target the most relevant audiences, who are most likely to convert!
What Does a Pixel Track?
You can use a Facebook pixel to track data events. An “event” is simply a specified action that a visitor takes on your website, such as making a purchase.
Facebook has predefined a set of 17 standard events, as follows:
Add payment info: A visitor enters their payment information during a checkout process
Add to cart: A visitor adds a product to their shopping cart on your site
Add to wishlist: A visitor adds items to a wishlist on your site
Complete registration: A visitor completes a registration form on your site, such as a subscription form
Contact: A visitor contacts your business; for example, via an email, telephone, SMS, chat or other type of contact on your site
Customise product: A visitor selects a specific version of product, such as choosing a certain size
Donate: A visitor donates funds to your organisation or cause
Find location: A visitor finds your business location via the web
Initiate checkout: The start of a checkout process; for example, clicking a “Buy now” button
Lead: A visitor signs up for a trial or submits a form that identifies them as a lead
Purchase: A visitor makes a purchase on your website; for example, landing on a ‘Thank You’ or confirmation page
Schedule: Someone books an appointment to visit your business location
Search: A visitor performed a search on your website
Start trial: Someone signs up for a free trial of a product or service you offer
Submit application: A visitor submits an application for a product, service or programme that you offer, such as a job application
Subscribe: A visitor subscribes to a paid product or service that you offer
View content: A visitor arrives on a specific page on your website, such as a product or landing page
You can also set up custom events yourself, to get even more specific about the kind of data you require. Custom events use rules based on specific URLs, we’ll see this in action in the following section!
How to Create a Facebook Pixel
Now that you know what data you can track, it’s time to create your first pixel!
Step 1: Create Your Pixel
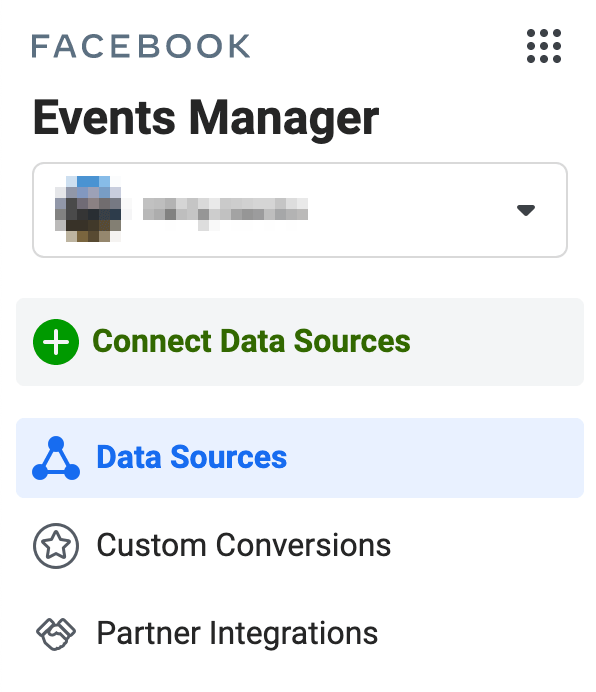
- Go to your Events Manager
- Click Connect data sources
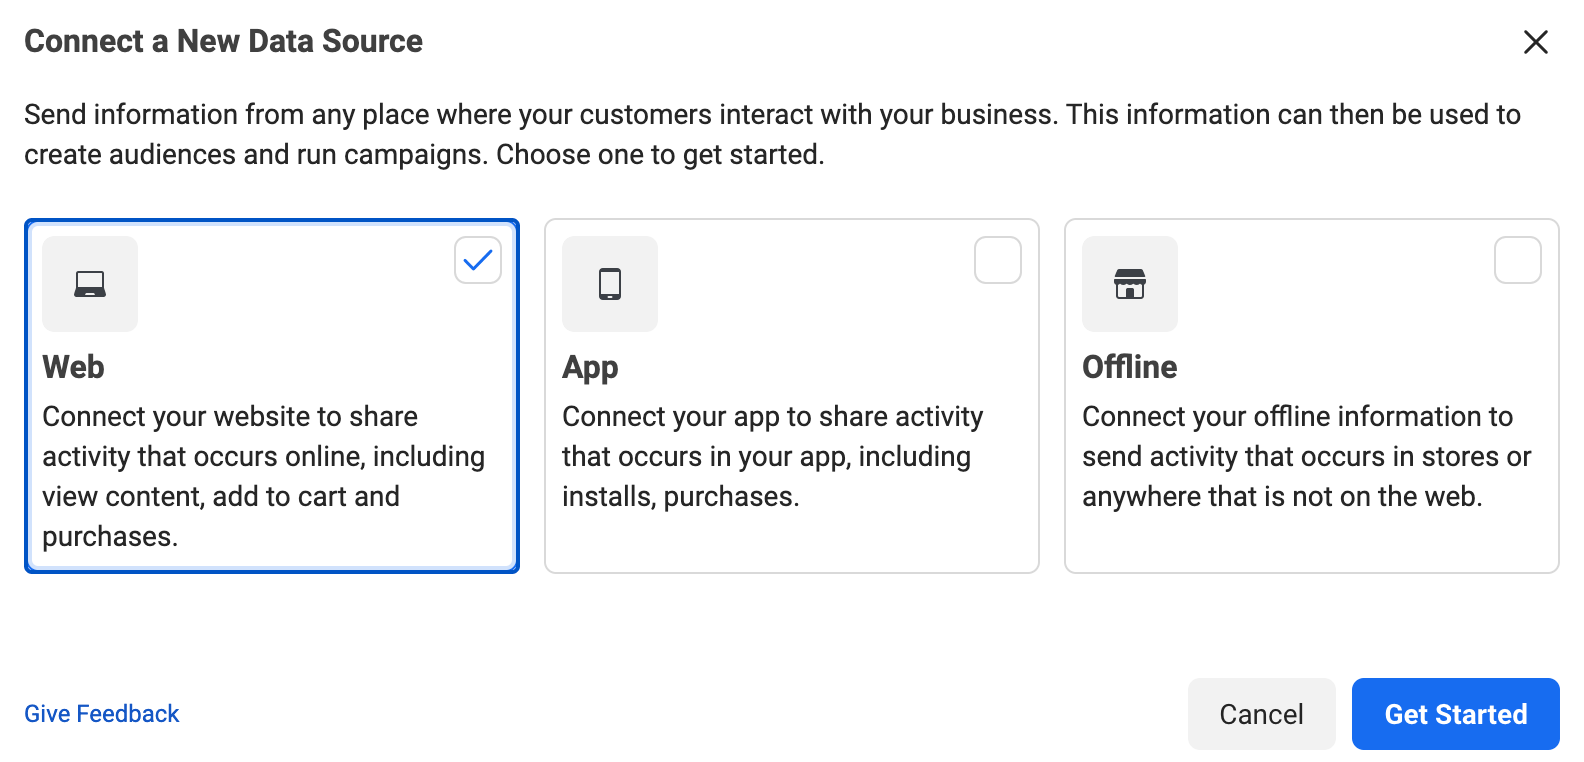
- Select Web and click Get Started
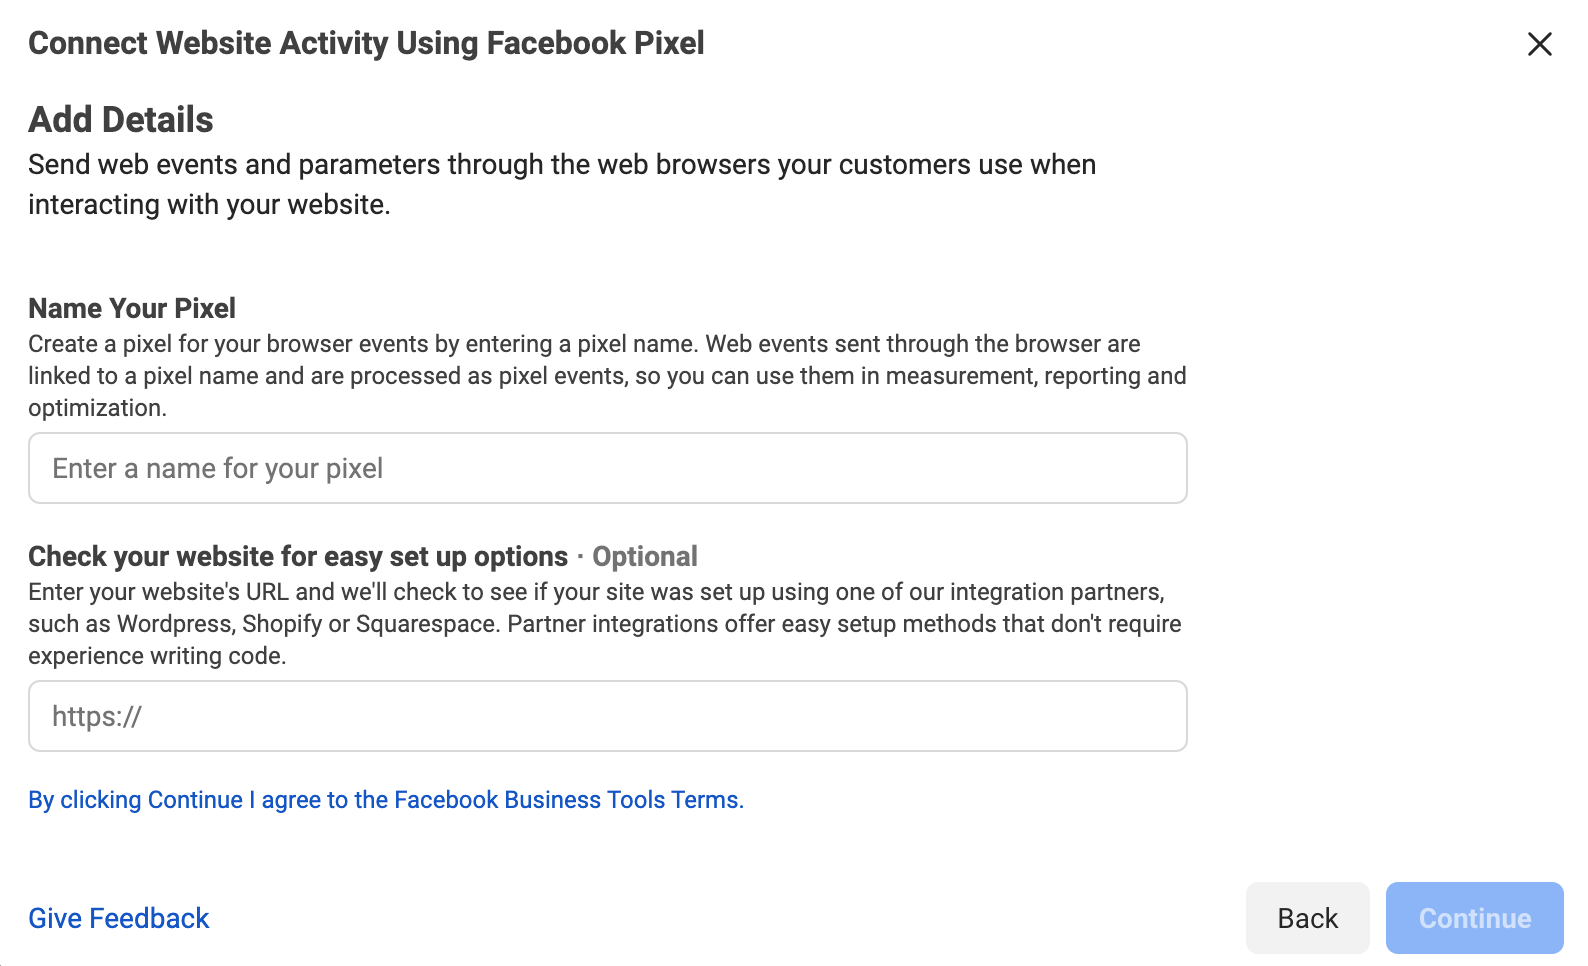
- Select Facebook pixel and click Connect.

- Add your pixel name, and enter your website URL (optional: to check for easy setup options), then click Continue
Step 2: Add the Facebook Pixel to Your Website
You now need to install some code on your web pages, so your pixel can start to gather information! There are a few different methods to do this, depending on your website platform.
![]()
- If you use a platform like WordPress or Squarespace, you can install your pixel without having to edit your website code directly, via the Use a Partner button. See the complete list of partner integrations.
- If a developer handles your website code, you can send them everything they need to set up your pixel via the Email Instructions link.
- If neither of these options apply, you will need to insert the pixel code directly into your web pages yourself. To do this, follow the procedure below!
- Select Install Code Manually
- Select Copy code
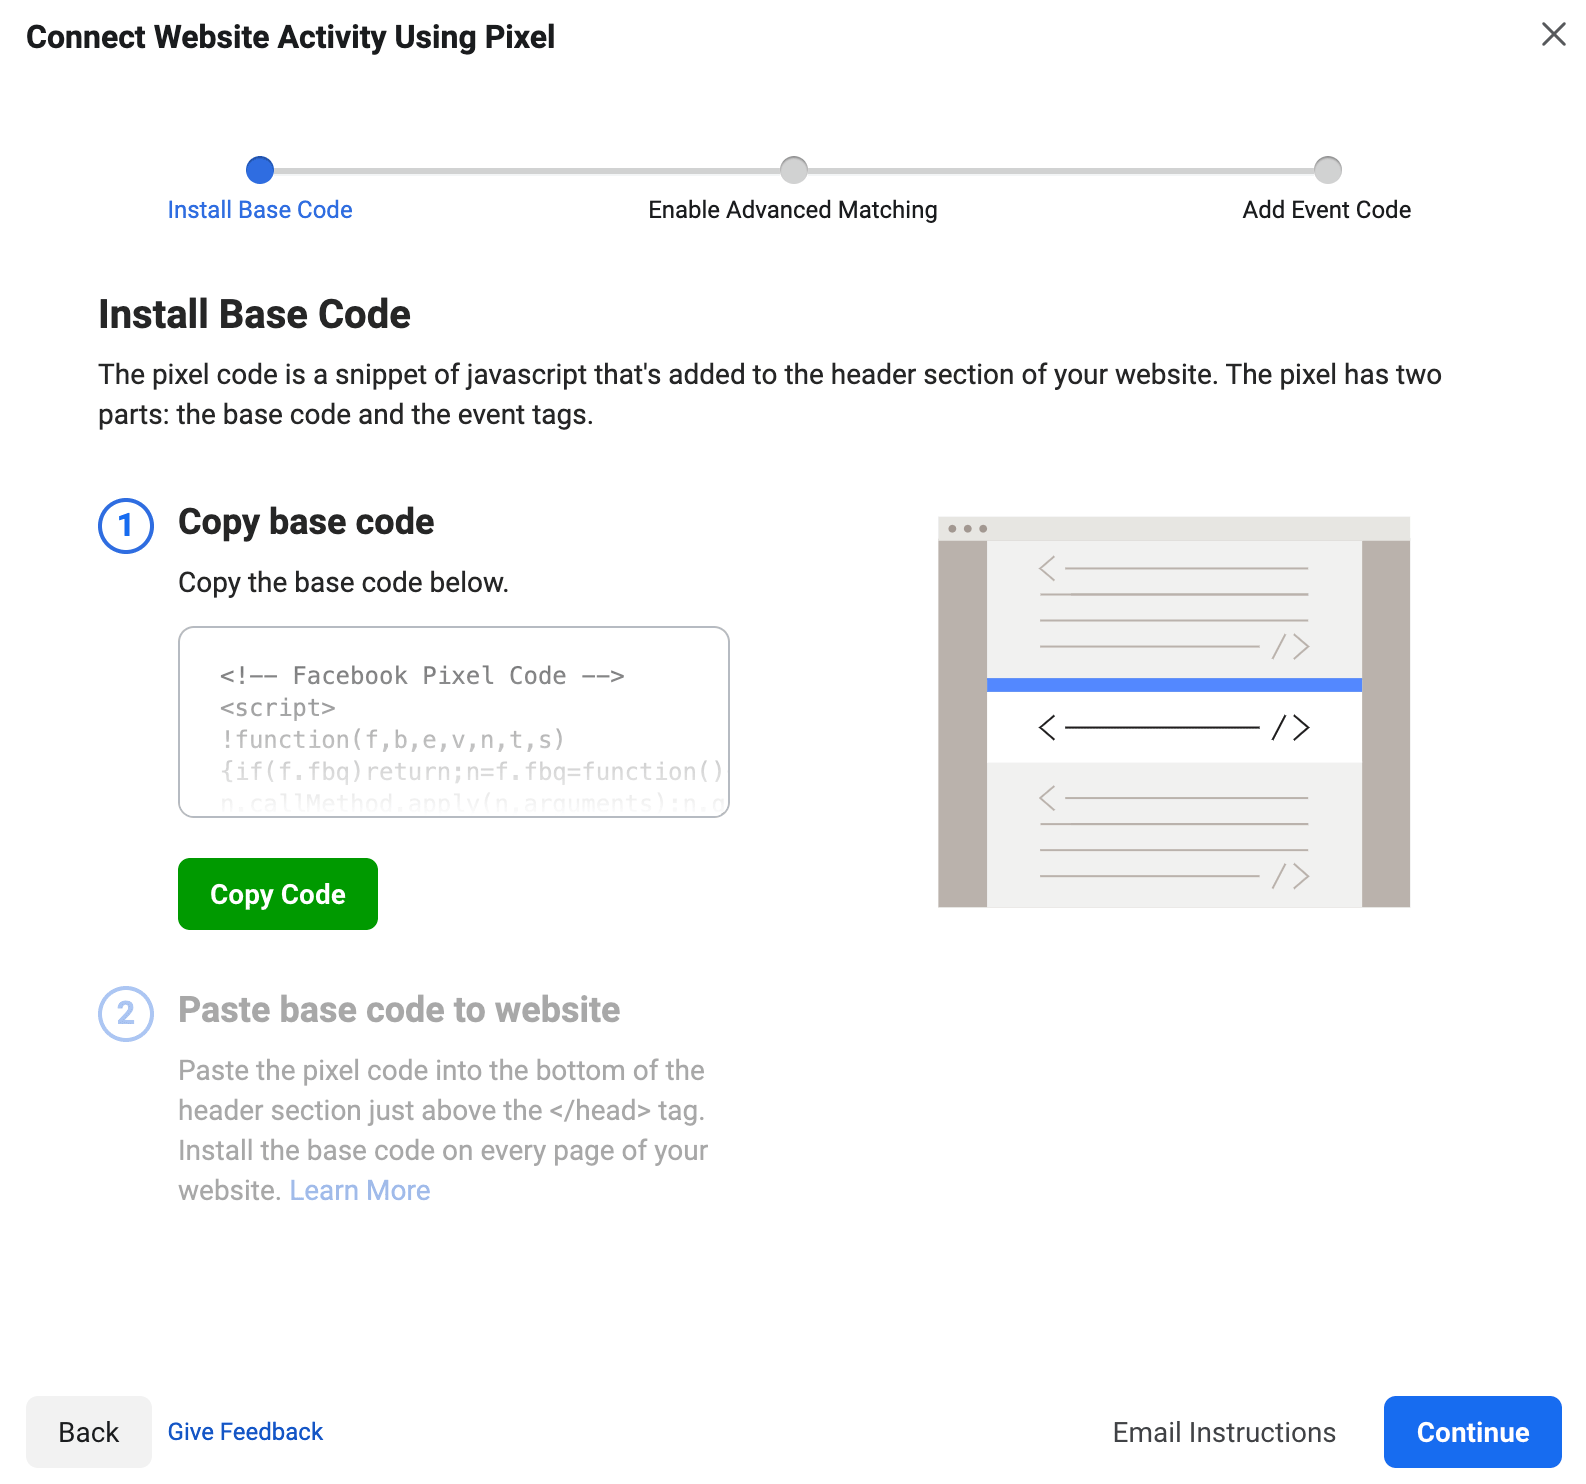
- Locate the header of your website; it may be a header template file in your CMS or web platform
- Paste the base code at the end of your header section, above the closing tag
- Click Continue
- Optional: Choose whether to use automatic advanced matching, to verify the customer information that you want to send and improve your reach; see about advanced matching to learn how this works
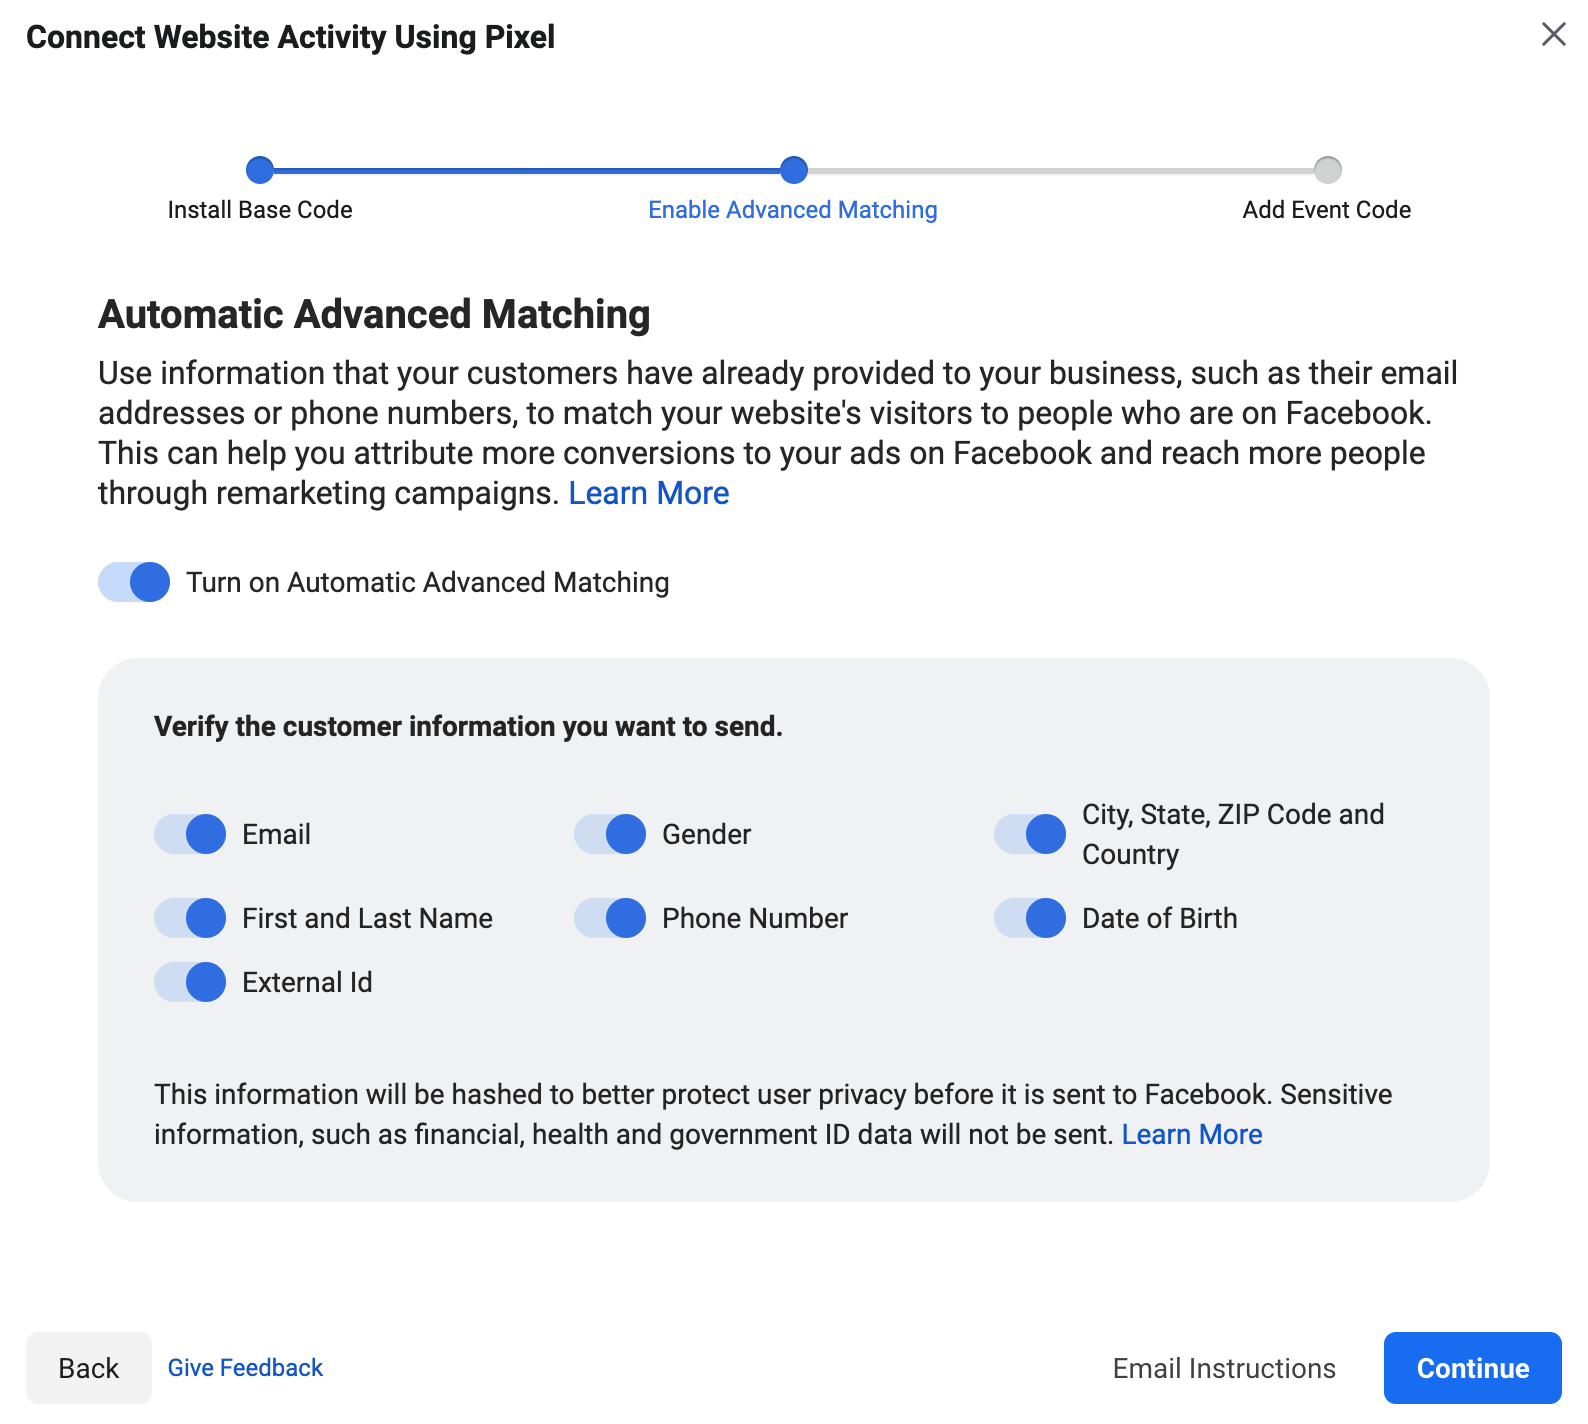
- Click Continue
Step 3: Setup Pixel Events
Once your pixel base code has been added to your website, you’ll be able to set up events to start measuring user actions. This can be done by manually installing the code or by using the Facebook Event setup tool:
- Click Open Event Setup Tool
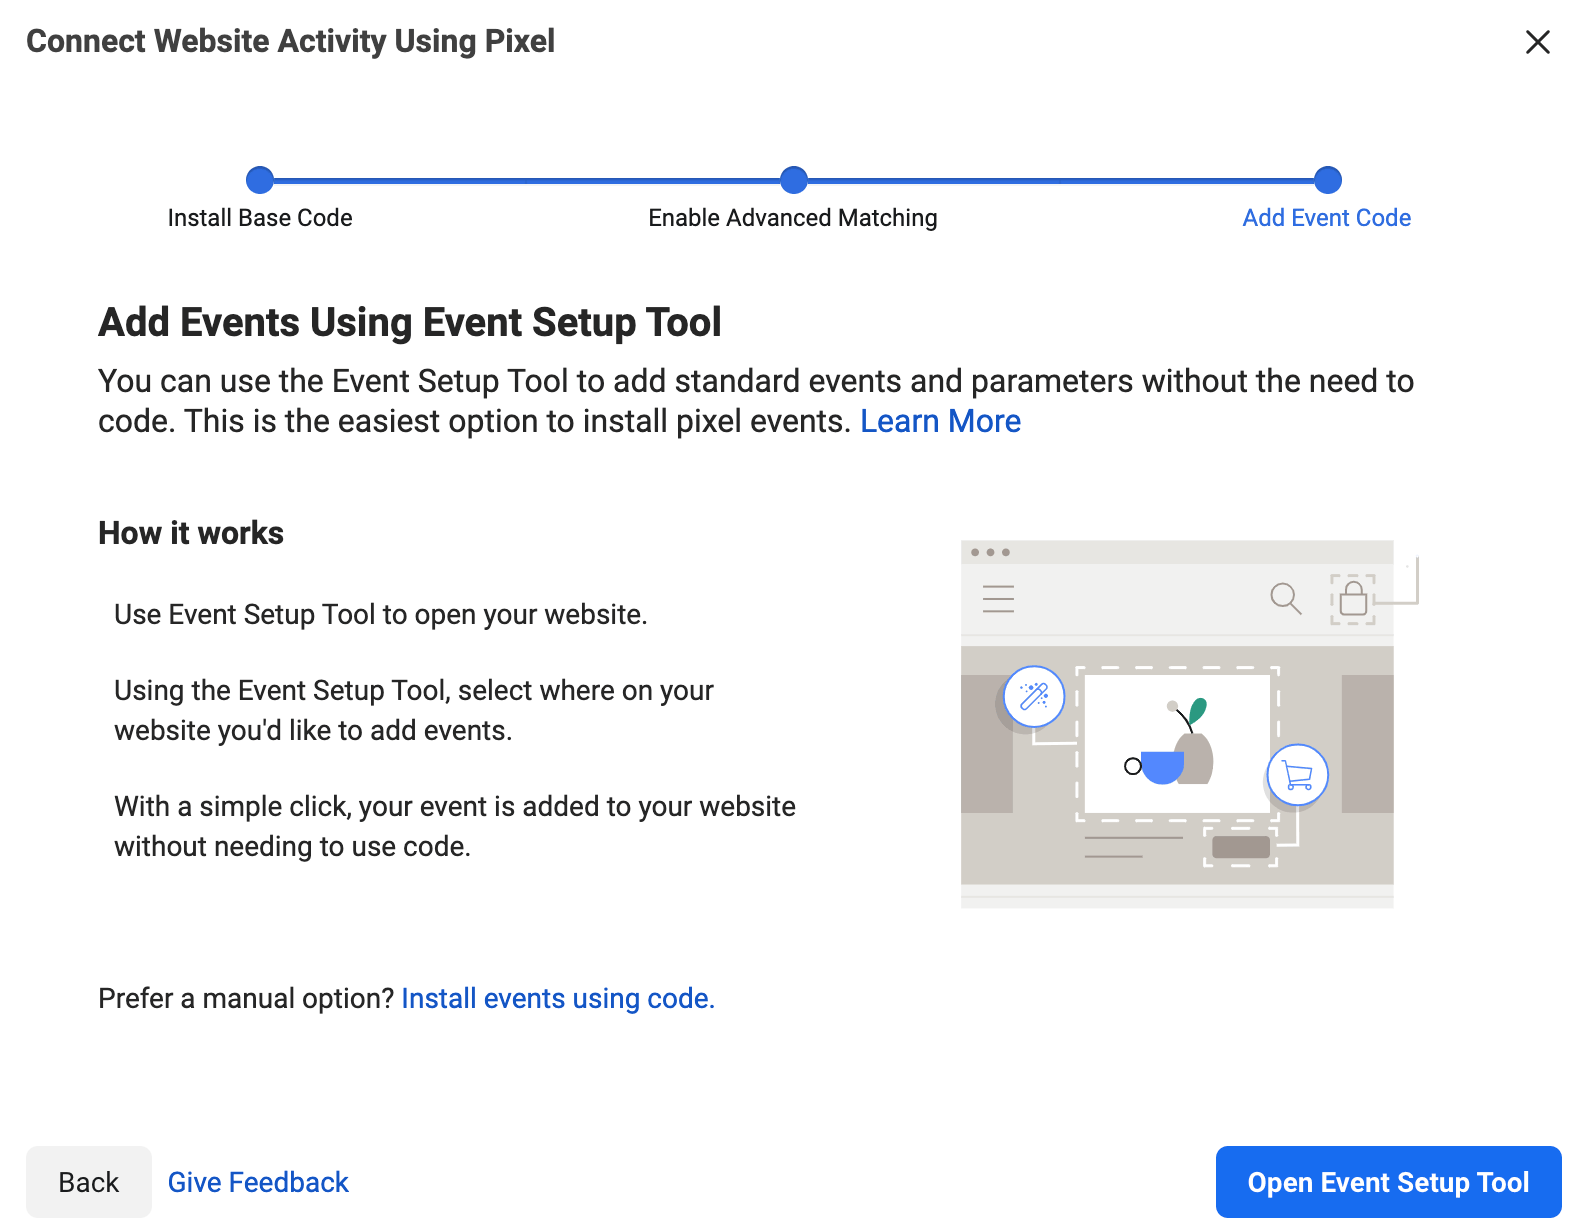
- Enter your website URL and click Open Website

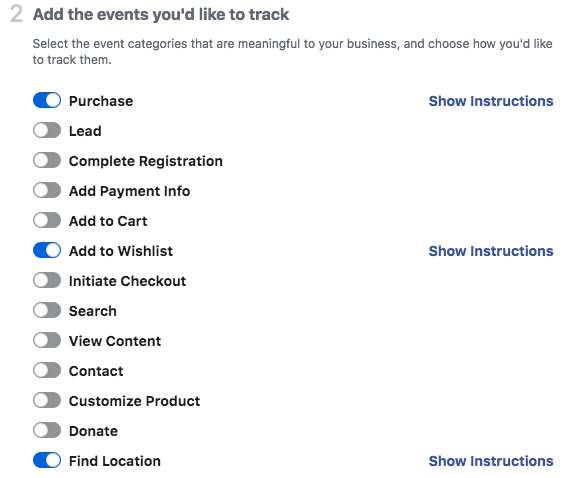
Step 4: Select the Events you want to Track
- Select which events you’d like to track using the toggle buttons. You can also set parameters for some events. For example, maybe you want to track purchases over a specific dollar value.
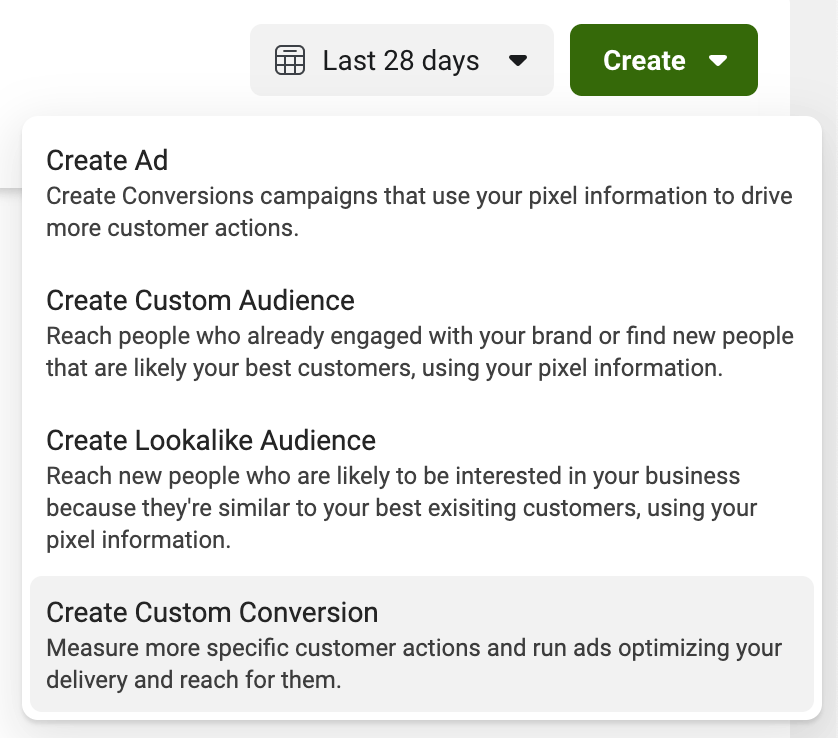
- Optional: You can create completely custom events with custom conversions.
- Open Facebook Events Manager
- Select Create
- Choose Create Custom Conversion
For example, you may have a page on your site that redirects to a specific URL after a visitor signs up to your newsletter e.g. www.mysite.com/thanks-for-subscribing.
You can track your subscribers (anyone who visits this page) by setting a rule as follows:
- Click the Select your own category link
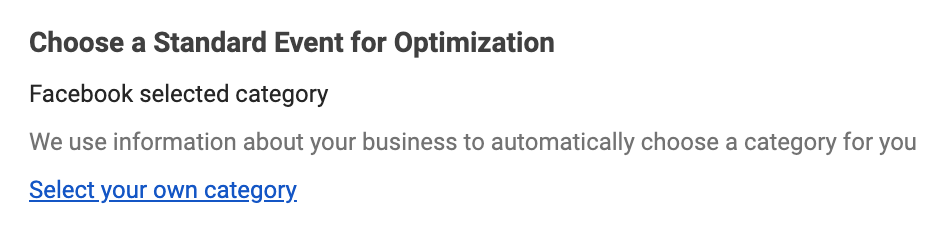
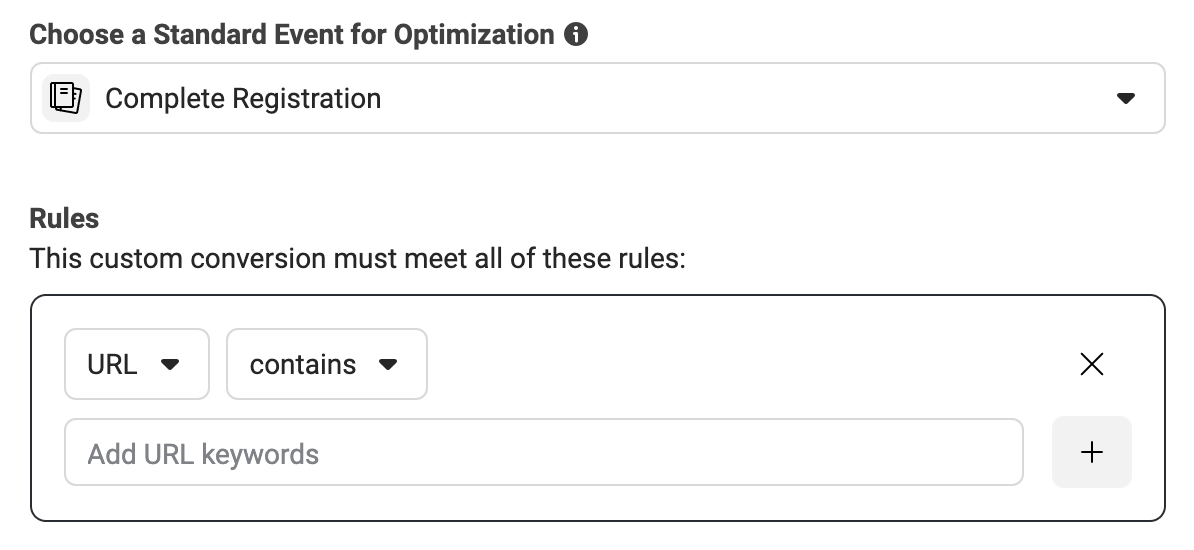
- Select Complete registration, from the event dropdown menu
- Under the ‘Rules’ section, ensure URL and contains are both selected
- Enter ‘thanks-for-subscribing’ as the URL to track
- Click Next and type in a name for your Custom Conversion
- Click Create! You can continue the same process to track your visitors in an endless number of ways, so you can optimize for highly specific actions to target with your Facebook ads.
Step 5: Check your Facebook Pixel is Working
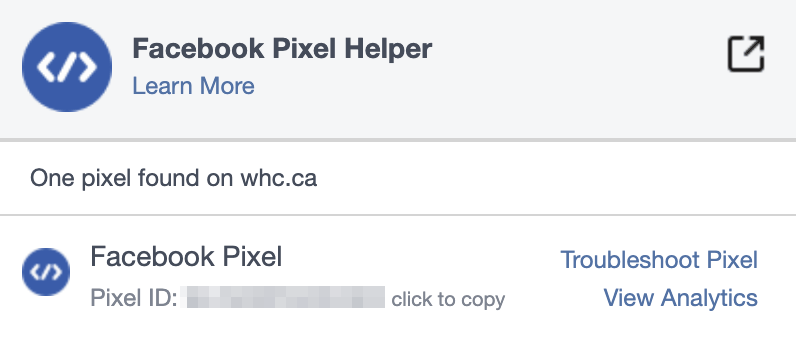
To ensure your Facebook pixel is tracking data flawlessly, you can test it with Facebook Pixel Helper.
- Add the Facebook Pixel Helper extension to your Google Chrome browser.
 This tool is only available in Chrome.
 - Now visit your website to test the installation. If the extension finds a pixel, the ‹/› extension icon will change to blue, and a popup will tell you the number of pixels it finds on the page. The popup also tells you whether or not your pixel is working correctly! If not, it will give the error information so you can fix the problem.
Step 6: Add a Pixel Notice to Your Privacy Policy
To comply with Facebook’s legal terms, you need to make sure visitors to your website are aware that you’re collecting their data.
You can do this by editing your website privacy policy. Be sure to clearly state that you are using a Facebook pixel and that their information may be collected through cookies. You should also let them know how to opt-out of Facebook Ad data collection.
How does Facebook Pixel Add Value to my Campaigns?
A Facebook Pixel will make advertising on Facebook much more effective for your business. You’ll learn more about your audience, see exactly who you’re advertising to, and you’ll also have a greater number of ways to gauge the effectiveness of your campaigns.
Let’s see a few ways in which a Facebook Pixel can help improve your Facebook marketing results.
Retarget Your Site Visitors
You can use pixel data to show targeted ads to people who have already visited your site. You can choose to get specific, for example, you can target users with the exact product that they’ve already viewed on your website, or even previously added to a wishlist.
Optimize Your Ads for Conversions
Facebook tracking data can be used to optimize your Facebook ads for highly specific conversion events on your website. If you don’t use a pixel, the only conversion you can measure are link clicks. A Facebook pixel allows you to optimize for a whole range of conversions, such as purchases and new subscribers.
Create Ads to Target the Big Spenders
A Facebook pixel lets you see who buys from your website and how much they spend. With this knowledge, you can automatically show your ads to the people who are most likely to make purchases.
Create Lookalike Audiences
The data provided by a Facebook pixel can help you build a “lookalike audience” of people who have similar likes, interests, and demographics to your regular website visitors. This can help expand your reach and potential customer base.
Access Exclusive Facebook Ad Tools & Metrics
A Facebook pixel lets you use tools such as web conversion campaigns, custom audiences, and dynamic ads. You also need the pixel to track metrics such as cost per lead or cost per conversion.
Are You Ready to Convert More Customers?
By helping you to better understand the behavior of your website visitors, a Facebook pixel is an invaluable tool for refining your advertising strategy. To reach your full potential when advertising on Facebook, a pixel is the way to go!
Want to learn more about Facebook? This article continues Web Hosting Canada’s ongoing series on Facebook marketing, strategy, and tactics. Follow us on Facebook to get updated when we post our next guide: How to Advertise on Facebook.
 About the author: Tim Robards
Tim is WHC's Technical Writer & Integrator. When he's not writing user guides or filming tutorials, you’ll likely find him building websites or enjoying the great outdoors.
See all articles from this author Interested in writing for Web Hosting Canada?
Also on the WHC Blog
cPanel Price Adjustments
cPanel, the company behind the control panel used by Web Hosting Canada’s hosting services, has announced another price increase. We wanted to take the time to communicate how this change will impact your service pricing. These...
Read full article
WHC is now certified as a Great Place To Work!
Web Hosting Canada is now a certified Great Place to Work! Following a thorough and independent analysis conducted by Great Place to Work® Institute Canada. This certification is based on direct feedback from employees,...
Read full article